
If you are reading this you probably need a website done, you are thinking about hiring someone possibly to do it, or you want to tackle doing in on your own. In whichever case any web designer or digital consulting company will tell you to GO WITH A WORDPRESS WEBSITE!
You probably have heard that a WordPress Website is the best type of website to have… BUT WHY and how do you even go about starting one? Well in this blog post we will assist you step-by-step in the whole process in this order:
- Why you should use WordPress
- Finding the right Domain and how to search for available ones
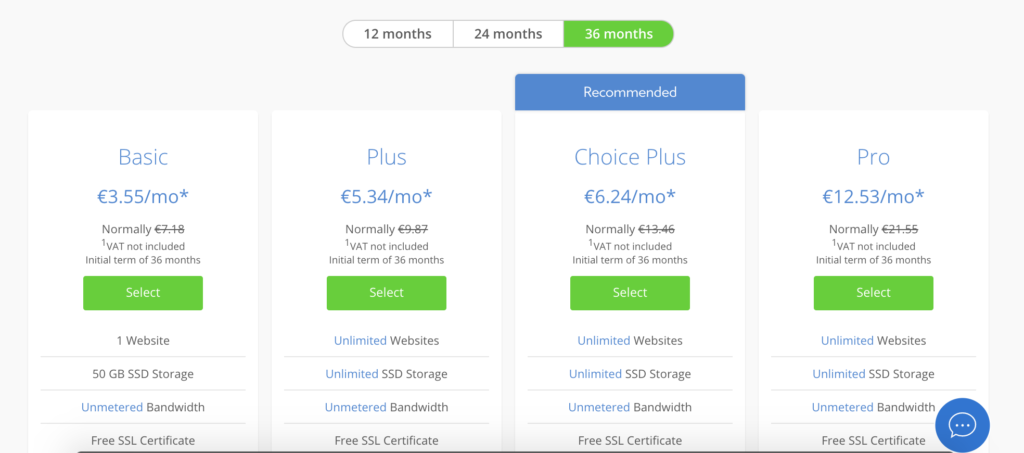
- Finding the right hosting plan – we recommend this one here (which starts from $2.95 per month and comes with WordPress) & choosing the website plan (you can choose between 12-36 month plans)
- How to properly setup WordPress (it comes with the domain and hosting so you don’t have to jump through hoops don’t worry ;))
- How to setup a WordPress theme
- How to start editing WordPress pages
- Installing WordPress plugins
- Creating WordPress Pages
- Creating a Blog
- Adjusting Site Navigation Settings
1. Why WordPress is great for a beginner website?
Well for starters WordPress is a content management software that can be installed after getting a domain and hosting. A content management system is basically a tool that makes it easy to manage important aspects of your website – like content – without needing to know anything about programming. …. if you are in the marketing, advertising or consultancy niche.. then WordPress is for you!
According to Cminds, “WordPress is the most popular content management system available on the web today. The platform currently holds a 62% market share for websites that were built using a content management system. Over 400 million people visit WordPress powered websites each month”
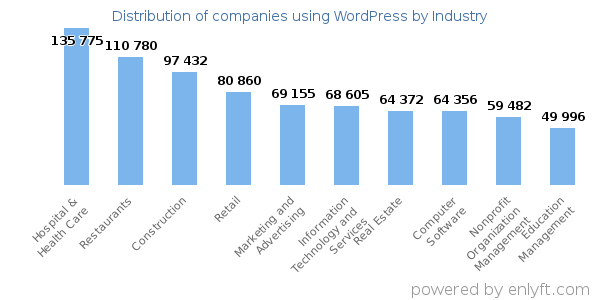
Some top benefits of choosing wordpress for your site:
- it’s open source
- it’s free
- it’s the ultimate DIY solution for website building
- it’s extra versatile – can run any website in any industry
- it’s fast, optimized, and secure
- it’s SEO-ready – makes promotion easier
- It has many free themes you can use
2. Finding the right Domain and how to search for available ones
A domain is the url that you will be using. In other words the url name you choose to go with such as www.yourlifeinnovated.com We chose this name because we are a consulting agency that aims to find innovative ways for our clients to succeed through their online presence.
In short, a good domain name should be:
- brandable – unique sounding, like nothing else that’s out there in the market
- easy to memorize
- short – those are also easier to memorize
- easy to type and hard to mix up – you don’t want people to be wondering how to spell your site’s name
- including niche-related keywords – for instance, if you do anything with social media, it would be cool to have “social media” somewhere in the name of the site; it works the same in non-social media industries too.
Now let’s search for AVAILABLE DOMAIN NAMES!!!! We advise to jot down a couple ideas first before moving on to the next step (we will show you in step 3 how to search for them)
Let’s start brainstorming for some names:

- socialmediastud.com
- socialmediastuds.com
- socialmediamatters.com
- socialmedianow.com
You can come back and meet us at Step 3 once you have done some brainstorming on your own!
FYI so now in Step 3 we are getting to the CREATING A WEBSITE PART below! In about 10 minutes after reading this you will have:
- Purchased a hosting plan with a free domain name included
- Installed WordPress
- Have a website ready to get edited and designed
3. USE BLUEHOST FOR HOSTING AND SEARCHING/CHOOSING YOUR DOMAIN NAME
So let’s get back to it!
In order to get our domain name and hosting plan (they come in a package deal) we are going to use Bluehost by using the link here.
Ok so let’s pretend I want to create a SOCIAL MEDIA AGENCY. In order to find out if the name is taken I would need to use this link here to purchase the domain and hosting through Bluehost. We will be searching for domains that are available. It will leave you on this page…. Next Click Get Started
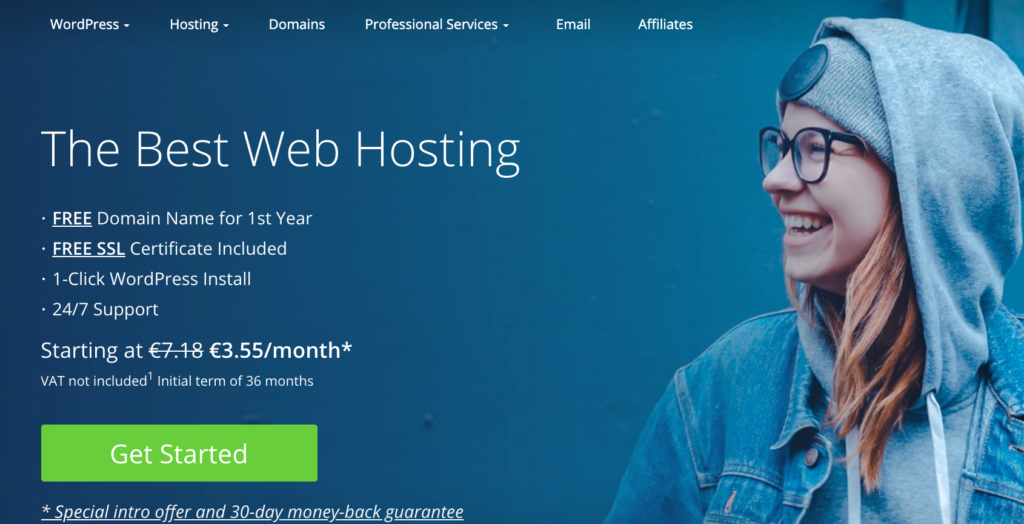
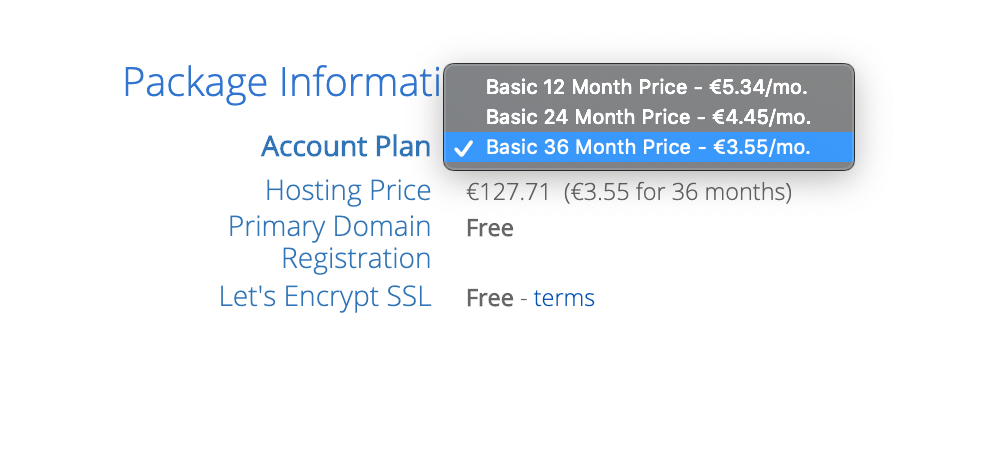
Now you will have to choose a hosting plan. If you are a first time website owner the first option will do just fine. FYI we are writing this blog and managing a digital marketing company with the first option. As you can see there are different prices. Of course if you choose the plan that renews every 36 months it is cheaper than going with the 12 month one. It is completely up to you!
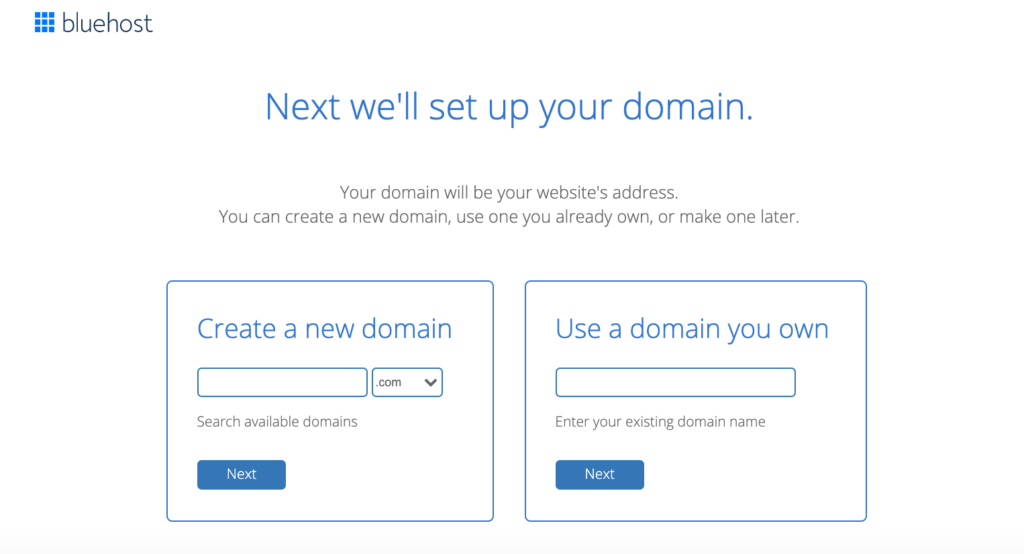
In the next step create a new domain and SEARCH for your domain in the first box. (if you already have a domain purchased simply type it into the second box on the right)
P.S. At this point if you have no idea still what you want to name your site Domain Wheel can help you. Go to their website and start by inputting a seed keyword that defines your website well. Come back here when you are ready to proceed with the domain and hosting with Bluehost.
Wonderful our domain SOCIALMEDIASTUD.COM WAS AVAILABLE!
Next, provide your personal data:
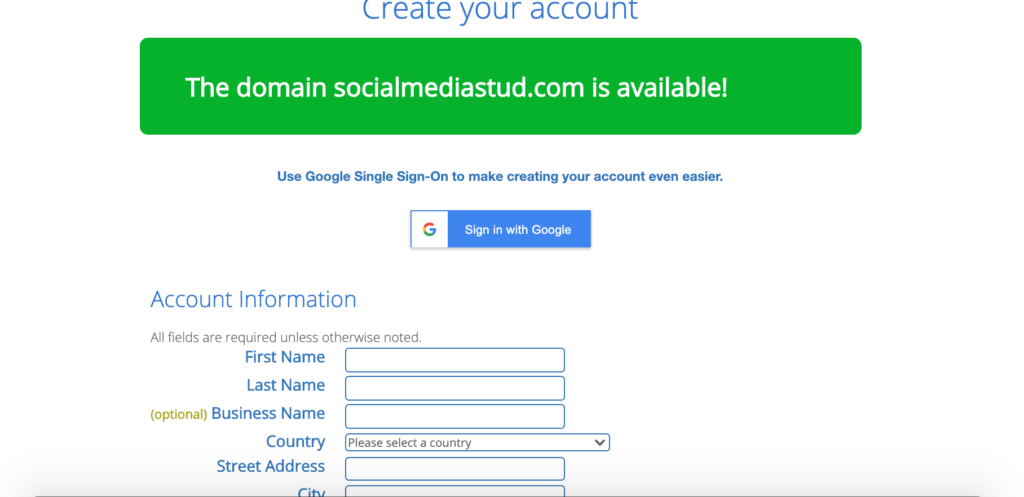
It’s good to check and confirm the parameters of the hosting plan that you’ve chosen. This can be found in the section labeled package information:
Next you can confirm the add ons that you wish to get with the package. Bluehost will automatically check the ones that they recommend that you get:
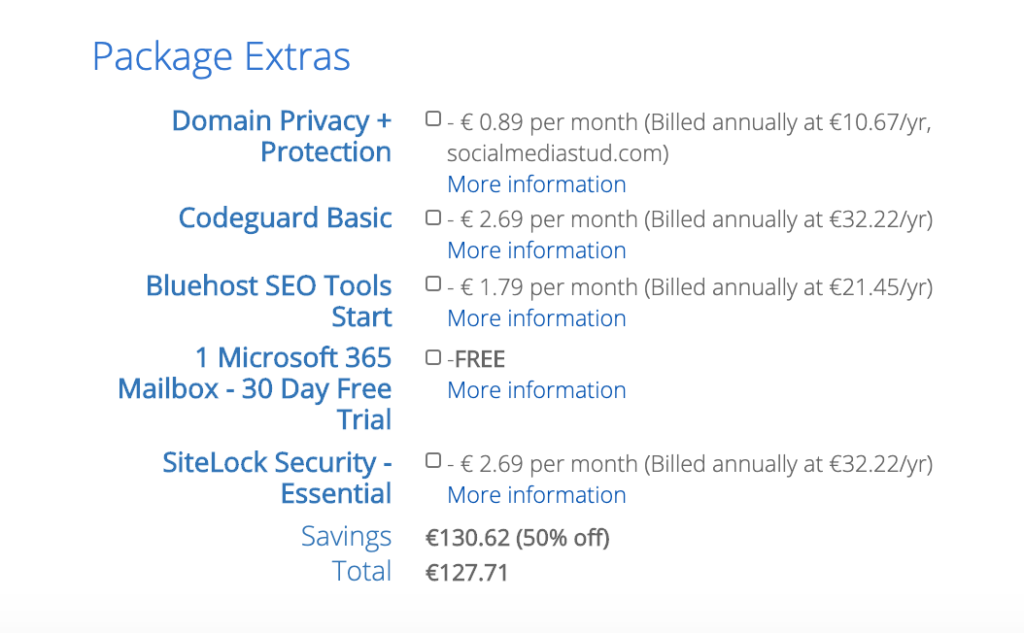
At this point, you can click on “SUBMIT” and finalize your purchase!
4. Setup WordPress in the Bluehost Dashboard
Remember WordPress automatically comes with Bluehost. You just have to click a couple buttons to get it all set up!
As soon as you finish the sign-up process with Bluehost, you will receive an email from the Bluehost with your details on how to log into your profile and begin working on your site.
Once you log in, Bluehost shows you an easy to use wizard that walks you through the process of installing WordPress on your hosting setup.
Alternatively, you can also install WordPress by going to the My Sites section and clicking on the Create Site button:
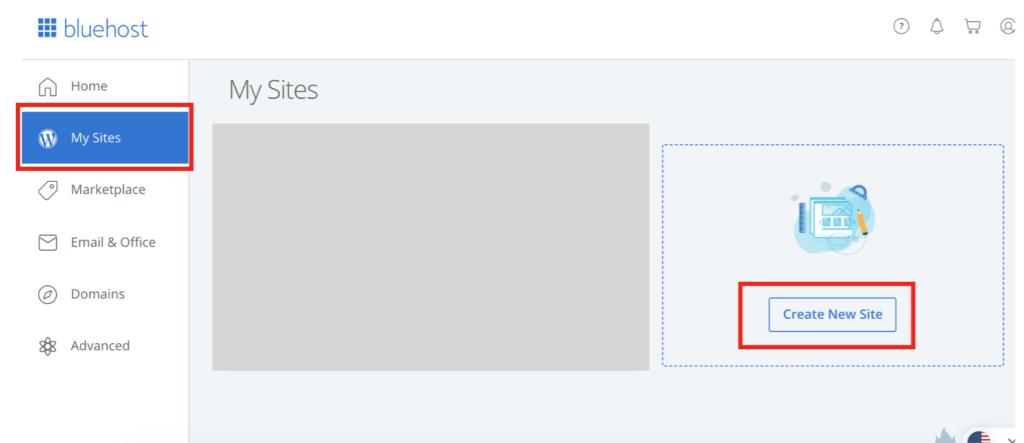
Now to install WordPress it will ask you the name of your new site and the username/password that you want to use for WordPress. Once you’ve completed this wizard, your site is ready to go!
5. Create your WordPress Website
The part we all have been waiting for! Setting up your site!
Warning: Creating a website is can get a little tricky and is super time consuming, if you would like us to assist you at any point with creating your site please schedule a call with me, Shawna, and I would love to get you up and running (as we are experts in web design).
Log in to your WordPress user panel if you go to www.YOURDOMAIN.com/wp-admin/
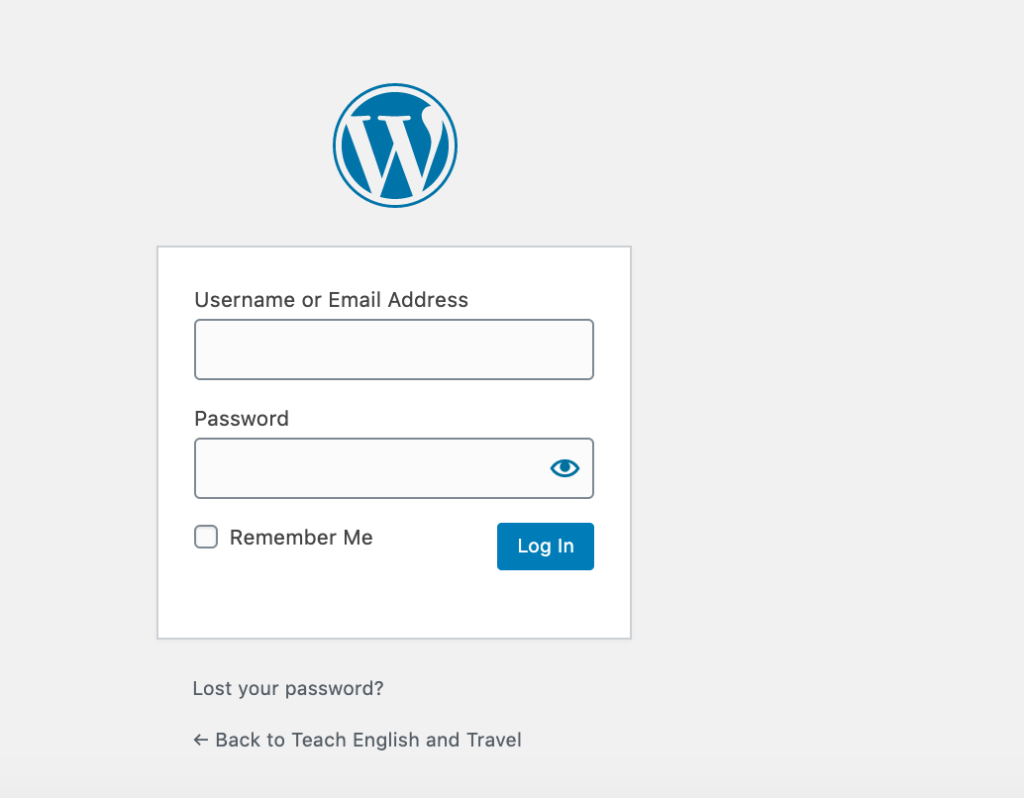
Use the username and password you previously setup in the last step.
You will now see the WordPress Dashboard after logging in:
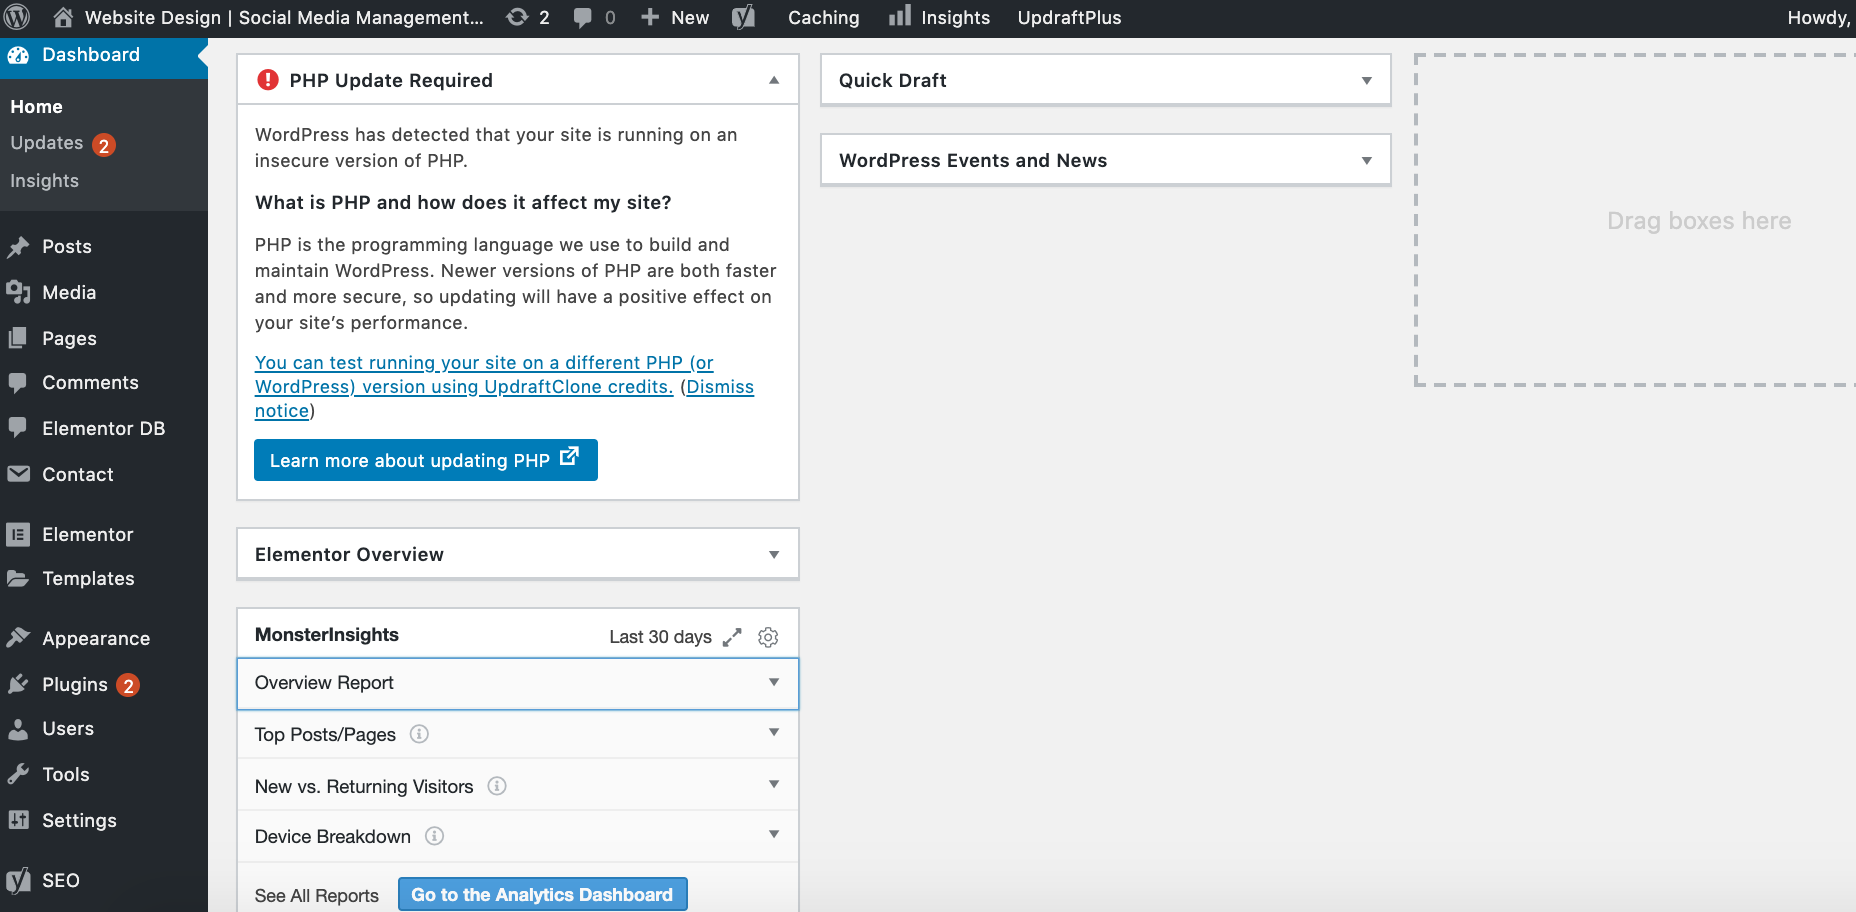
We advise getting some basic things set up before builing the site:
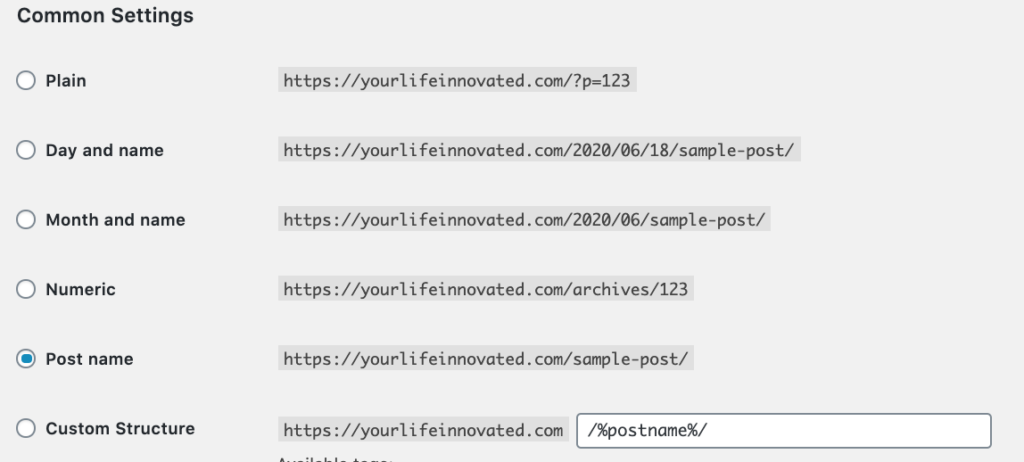
Set up your permalinks (the ending of your url) for example for your About page it would be yourdomain/ABOUT
Go to Settings → Permalinks from the main sidebar in your WP dashboard.
Select the POST SETTING option:
Next go to Settings and make your site Public. This box should be unchecked:

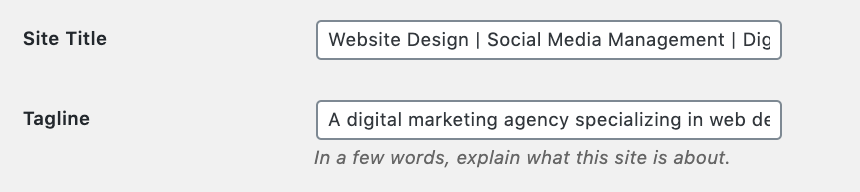
Next let’s create a Title for your site – Go to Settings → General and set the Site Title and Tagline fields to what you want. You do not have to fill in a Tagline if you do not want to.
Next, allow or disable comments on your website – it can be done in Settings → Discussion. We also advise to disable pingbacks and trackbacks.

Don’t forget to SAVE CHANGES at bottom!
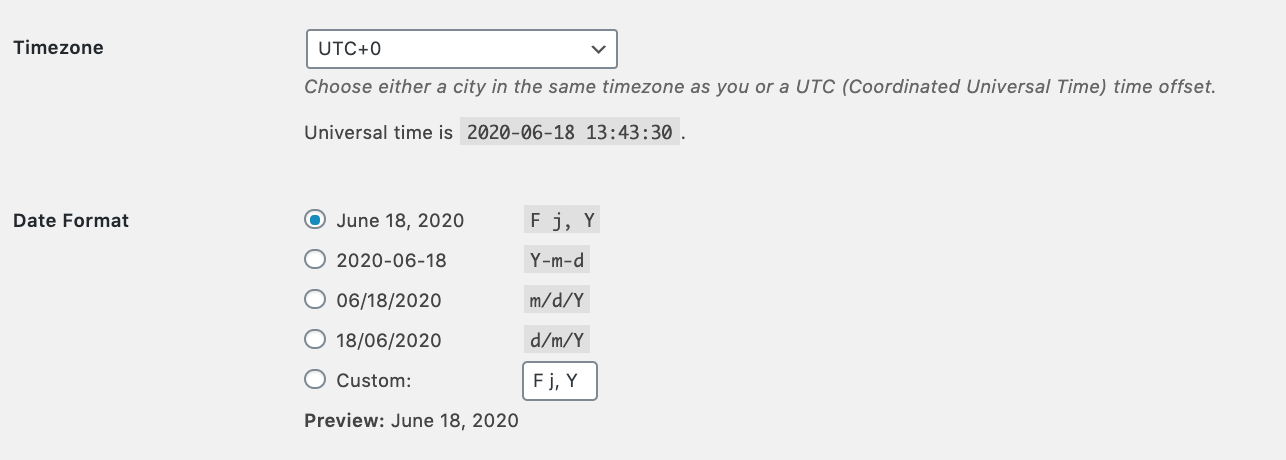
Next, change the time zone and the format that you want to see dates here – Settings → General.
6. Setup a Theme on your WordPress Website
You are going to need a theme. A theme is a collection of templates and style sheets used to power the display of a WordPress website.
Go to Appearance> Theme> Add New
We like using Astra or Hestia.
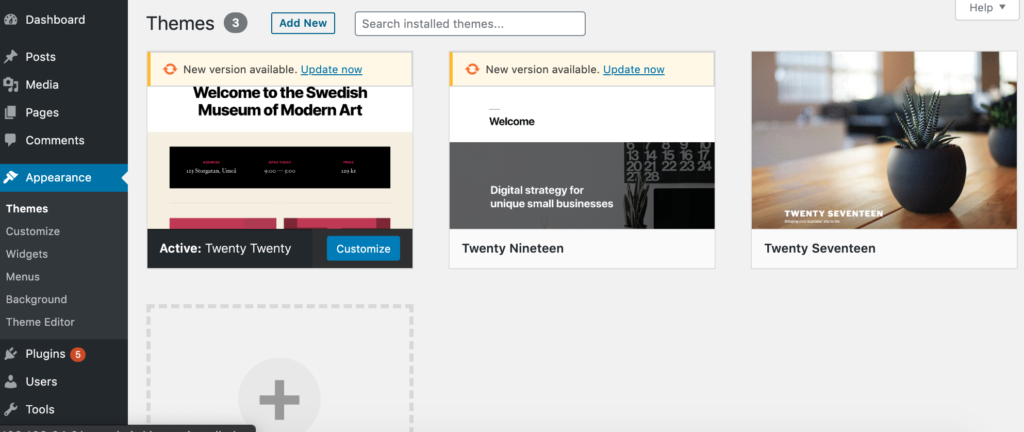
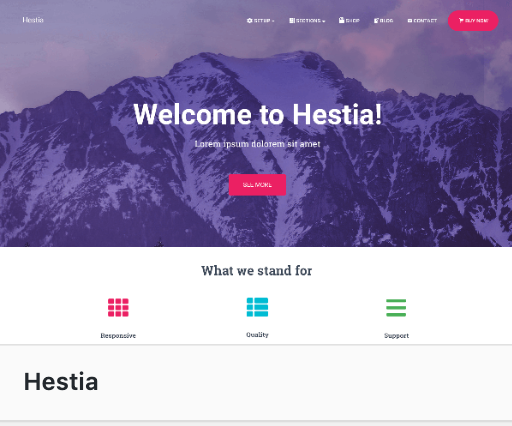
We will search for HESTIA after pressing ADD NEW. Then we will click INSTALL then ACTIVATE:
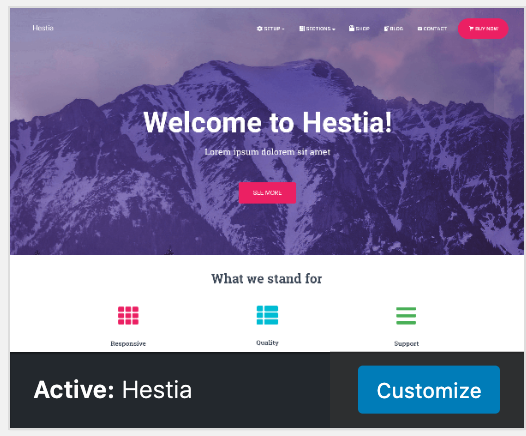
A theme should look like this when it is ACTIVE:
Hestia is a theme that offer ssme excellent onboarding for new website owners. To see what the theme has , click on the button IMPORT DEMO CONTENT from the welcome prompt.

Next, it will ask you to import some recommended plugins – check and import all:
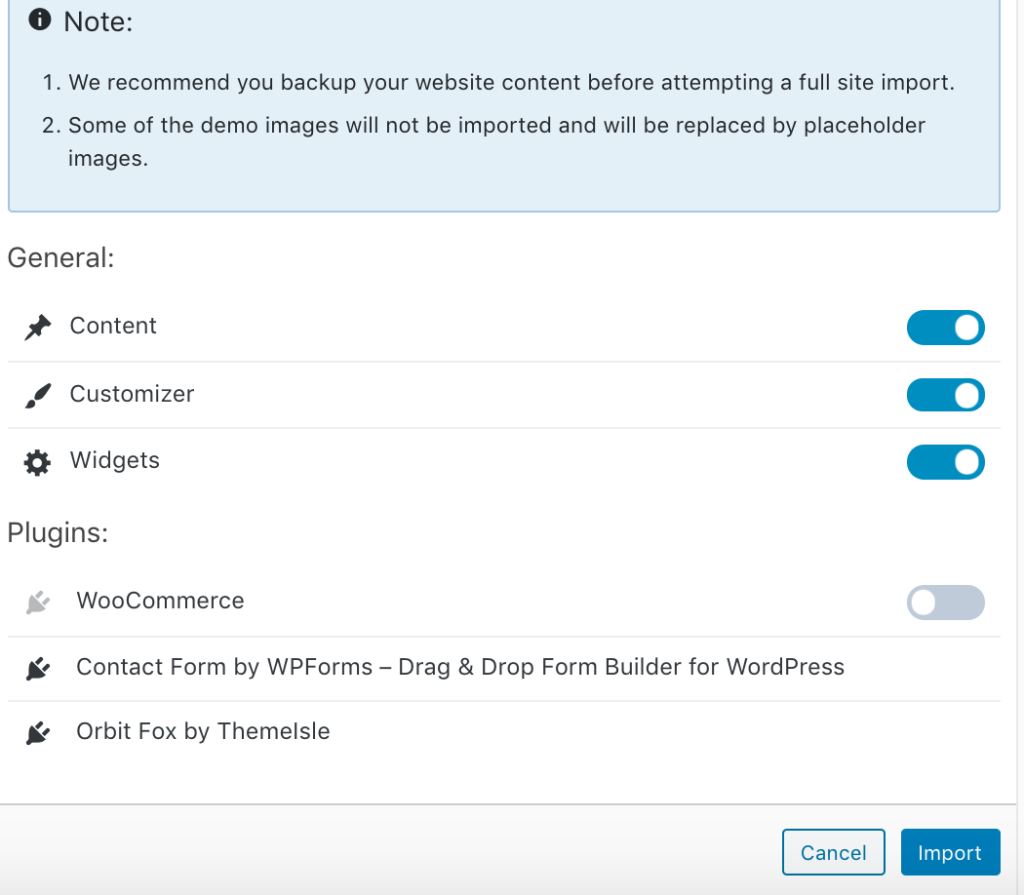
After this you should see a success screen and you can now VISIT YOUR SITE:
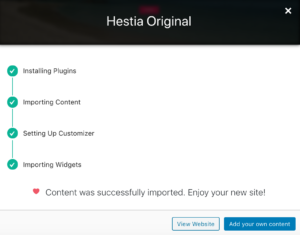
Your new theme is active on your site. You can see it in action by going to YOURDOMAIN.com.
Here’s what ours looks like so far:

Next we are going to Customize the theme by going to Appearance → Customize.
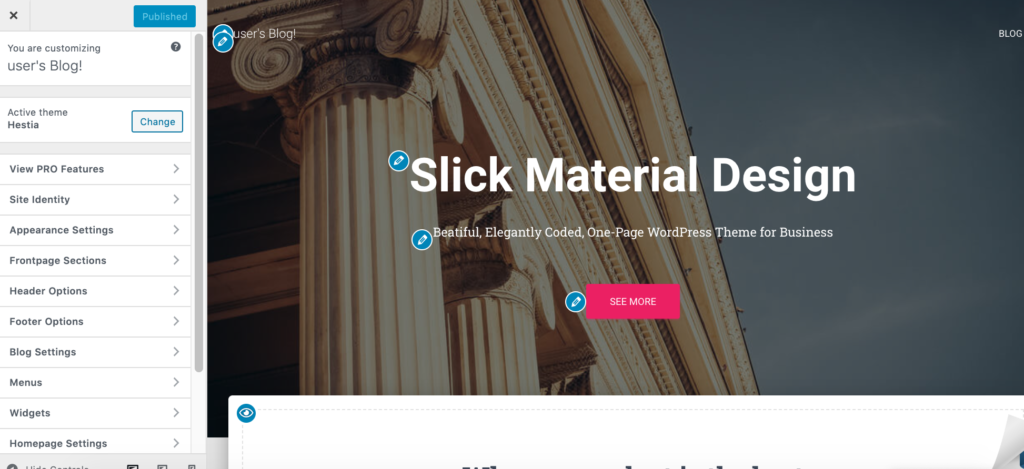
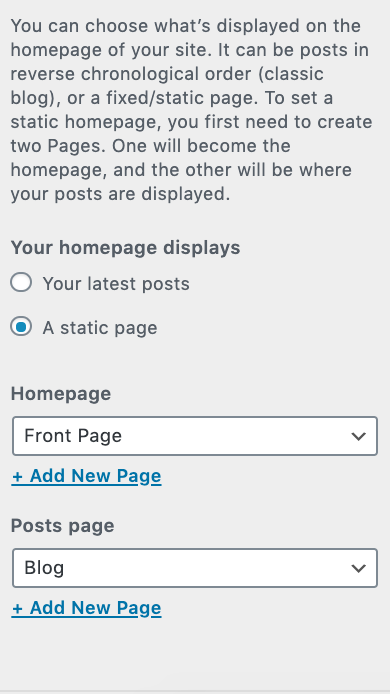
Set up your homepage
- Go to “Homepage Settings.”
- Select the option, “A static page” under your homepage display setting.
- Click on “Add New,” to create a new page to act as your homepage.
- Input the name for the page – “HOME” seems like a good idea – and click on “Add.”
- Don’t forget to hit “Publish”
Now let’s make changes to the actual site.
In order to make changes you have to click on the pencil icon next to the text field that you want to change.
Let’s change the headings by clicking on the pencil icon:
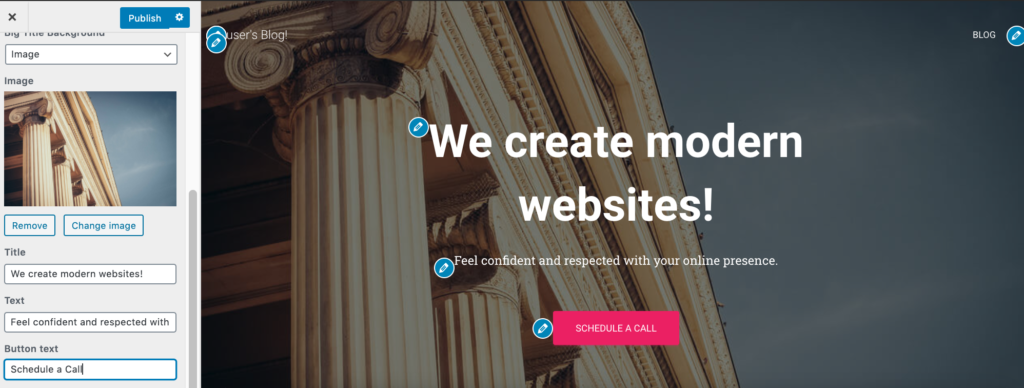
As you see on the left is the box where we have the ability to make as many changes as needed to headings, background images and more:
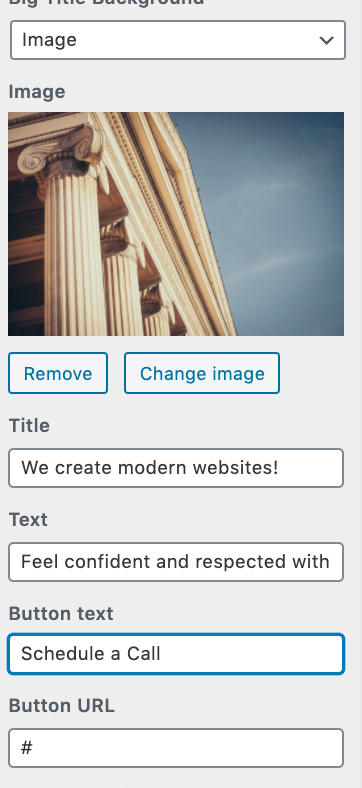
Don’t forget to click PUBLISH when you are done!
You can go back and you will see this box where you can then Customize other section of the website such as the Features, About etc.:
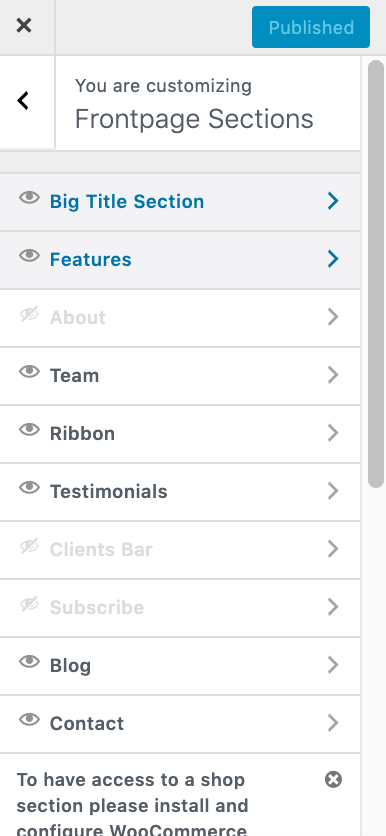
Let’s click on Features and edit the sections like we did before.
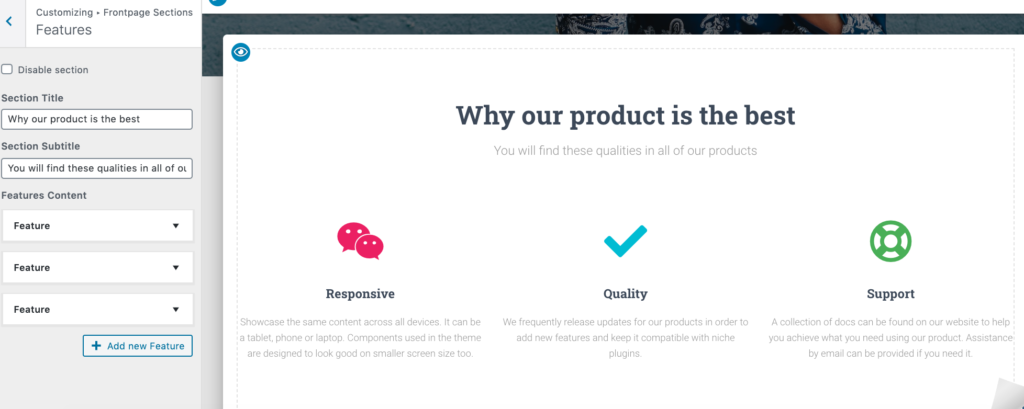
You can continue to do that for About, Team, Testimonials, Contact and Ribbon. (Ribbon is another place for you to put a call to action).
When you are done editing those sections don’t forget to hit PUBLISH
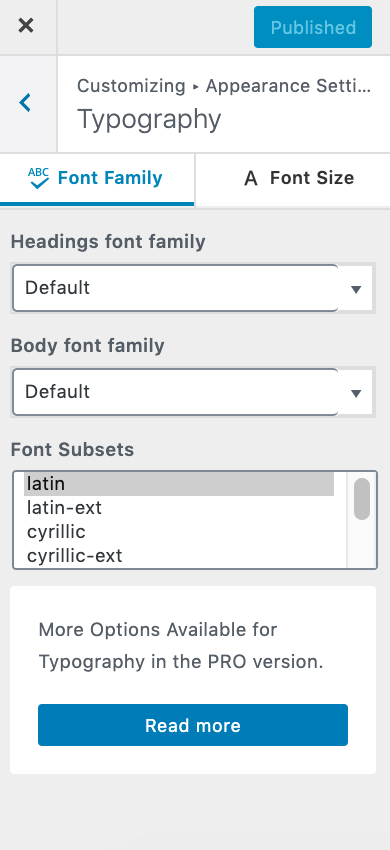
Now you should Adjust the typography. Go to Appearance Settings → Typography from the WordPress Customizer sidebar.
To change the default color scheme you can change that setting in the WordPress Customizer. Just click on Colors in the main sidebar.
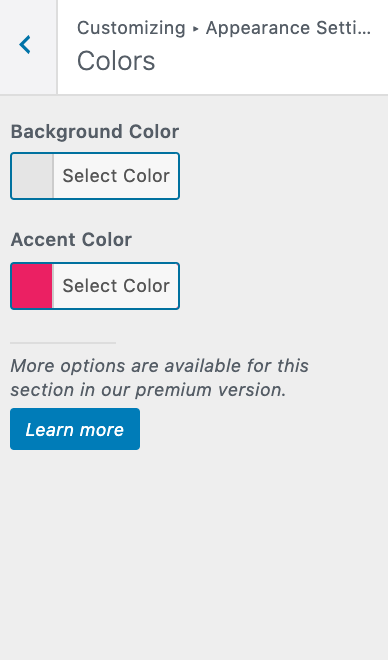
Accent colors are the colors used for buttons and other things meant to stand out on the website.
Those are the basics on creating your first WordPress website. Of course there are a lot more options in the customizer settings that you can play around with.
Note: In order to truly get a custom look we advise hiring a WordPress designer. If you are interested in this please don’t hesitate to Schedule a Call
Step 7: Get plugins to allow your website to work better
Plugins are like apps to a phone
In other words, they extend the standard functionality of your site by adding some much-needed features. The best part is you don’t have to know coding!
Here are the plugins you should get – they are all free:
- Yoast SEO – helps your search engine optimization and make your site visibile on Google or Bing
- Google Analytics for WordPress – this one integrates your website with traffic analysis – you can see how many people have visited your site etc.
- Wordfence Security – improves the security of your WordPress site
- UpdraftPlus – does automatic backups of your website and uploads them to your Google drive!
- Optimole – optimizes your images
- Contact form 7 – get amazing contact forms without knowing coding
These are just a few but there are awesome other ones too!
Installing plugins is easy. If it’s a free plugin then all you have to do is:
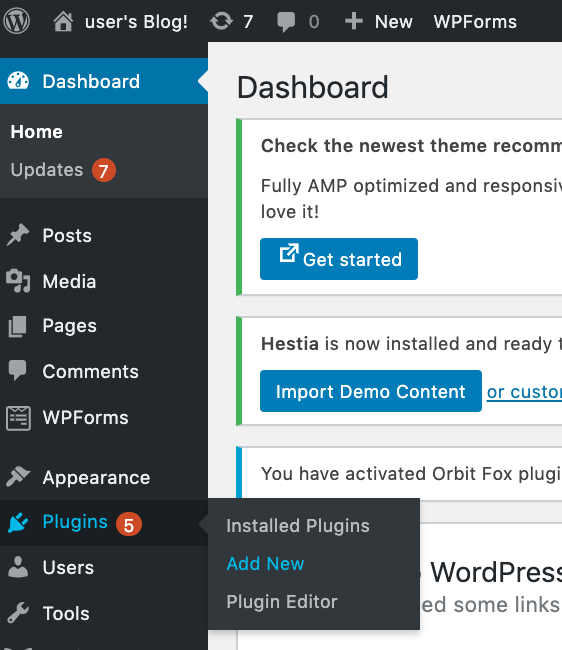
Go to your WordPress dashboard and then to Plugins → Add New. From there, input the name of the plugin that you want into the search field, and then click on “Install” and “Activate.”
8. Create WordPress Pages
To do that, simply go to your WordPress dashboard, and then Pages > Add New. You’ll see this screen:
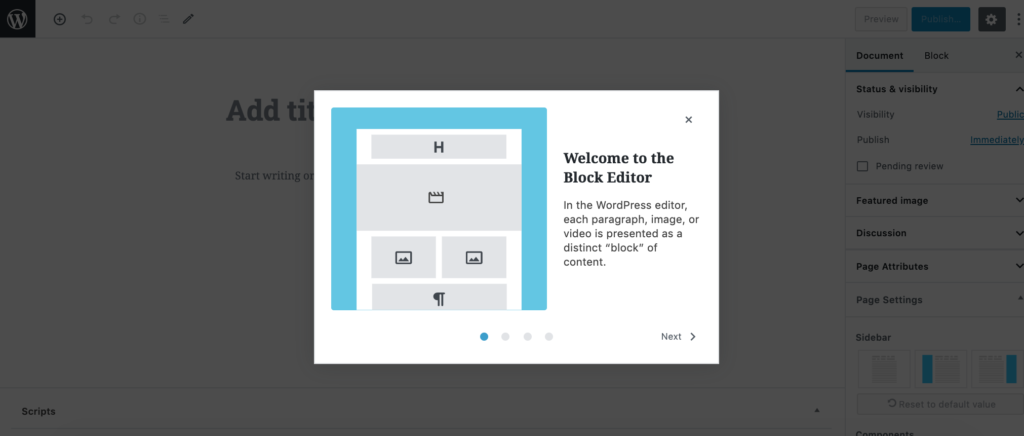
You can add a headline to the page.
Add a body section – the main content of the page. The interface is very similar to MS Word. You can bold, italics, aligning text to left/right/center, creating lists, etc.).
You can add images by clicking ADD MEDIA
You can Switch between the Text and Visual editors. That is only if you know HTML
When you are ready to Publish you can click PUBLISH
Discussion. Decide whether or not you want to allow comments
Add a Featured image. Most WordPress themes take that featured image and put it in a main part on the page
9. Create a Blog
Blogs are a great way to raise the ranks on Google and place you company in front of potential clients who come from search engine searches! Even Forbes thinks so!!!
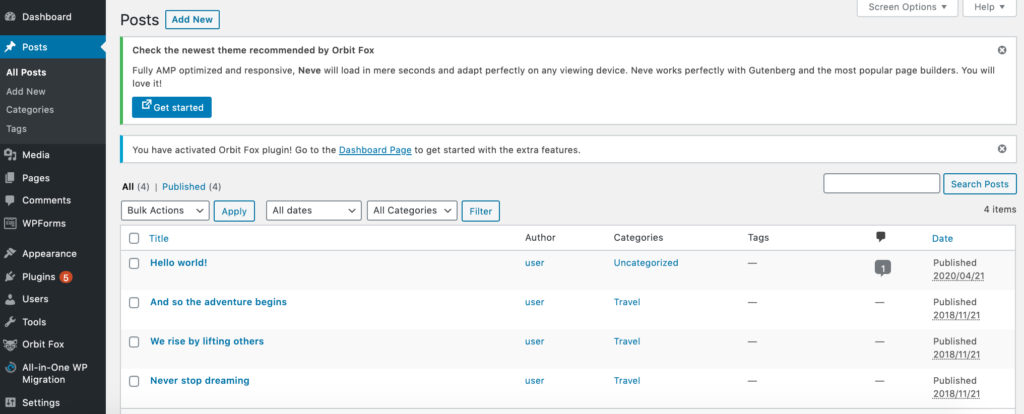
To create a new blog post, all you need to do is go to Posts > Add New (from your WordPress dashboard):
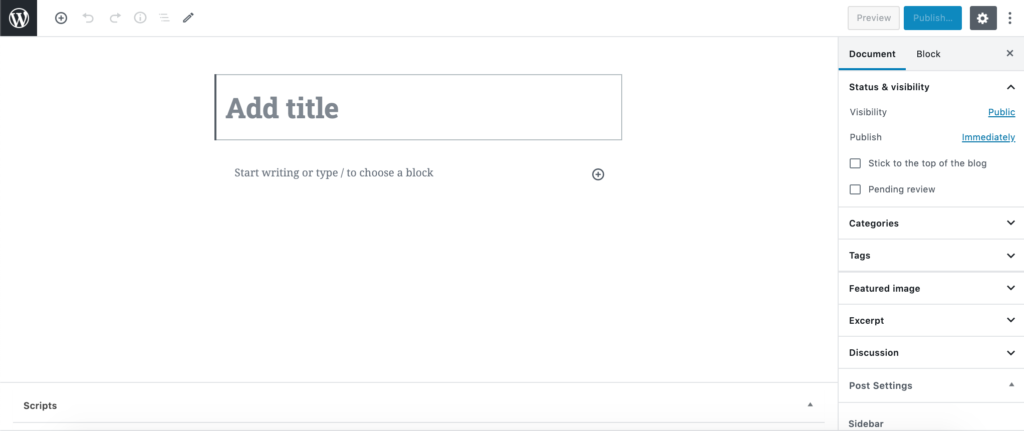
When you press ADD NEW it will look like the previous editing interface we used when we created a PAGE:
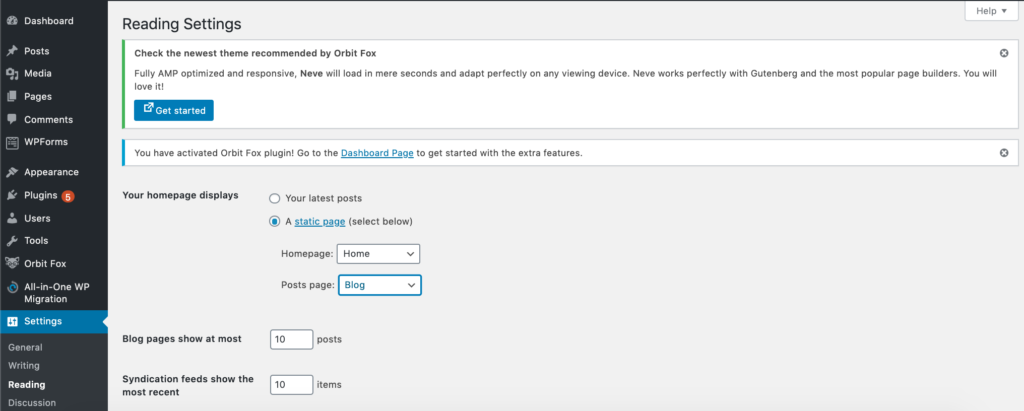
To make your posts easy to reach, you should make one page to be the main blog page for the posts.
- Go to Pages >Add New and create a new page. Name it “BLOG” –
- Next, go to Settings >Reading, and that new Blog page that we just created as the “Posts page”:
10. Adjust Site Navigation Settings
In other words we mean menus and widgets. These are how you “navigate” through your site.
Let’s start with Menus. go to Appearance > Menus in your WordPress dashboard. We are going to create our header menu at the top of the website.
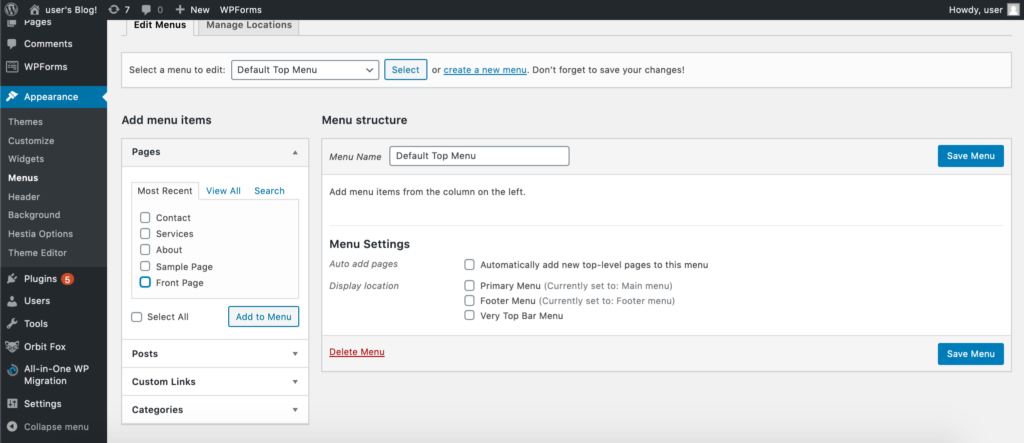
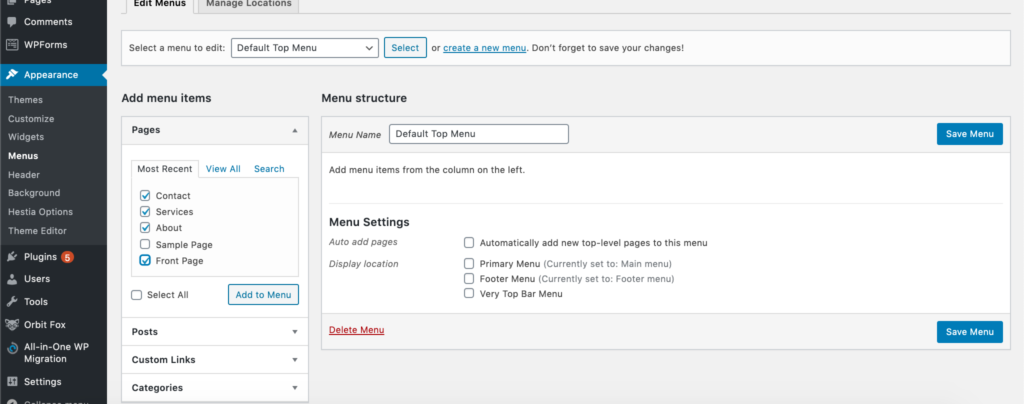
On the left check the boxes for the pages that you want to add to the menu, then select ADD TO MENU:
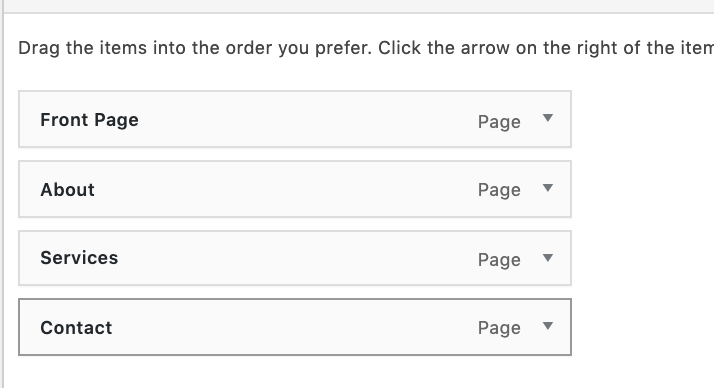
By dragging and dropping you can arrange the menu items in the order that you want:
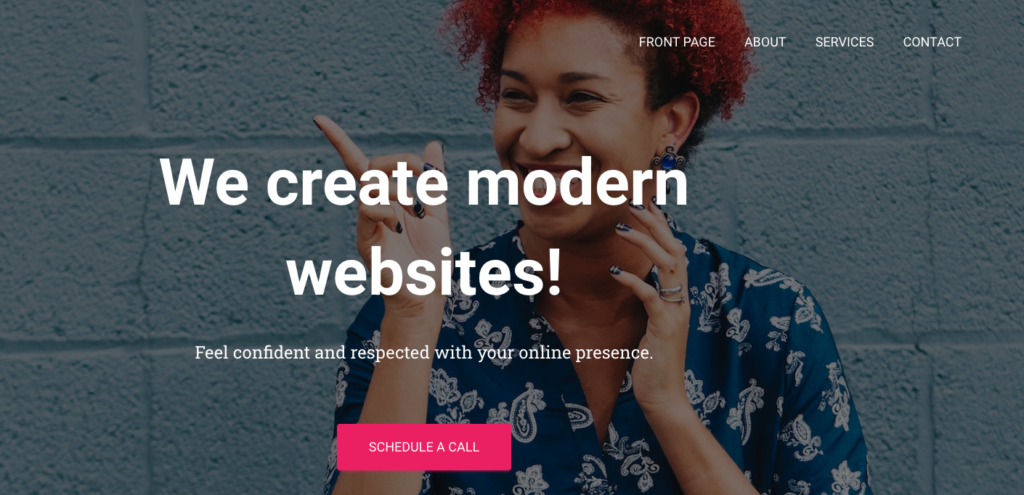
After, select the menu location at the bottom. If you select the location labeled “Primary Menu” it will result in putting the menu in the top section of the website. This is probably what you want for your main menu. Click on “Save Menu”
Let’s see what it looks like:
Last thing we will talk about are widgets. A widget is a small block of content that can be displayed in various places around the website.
Normally people put it in the footer or in a sidebar on their sites.
To add a widget go to Appearance > Widgets in your WordPress dashboard:
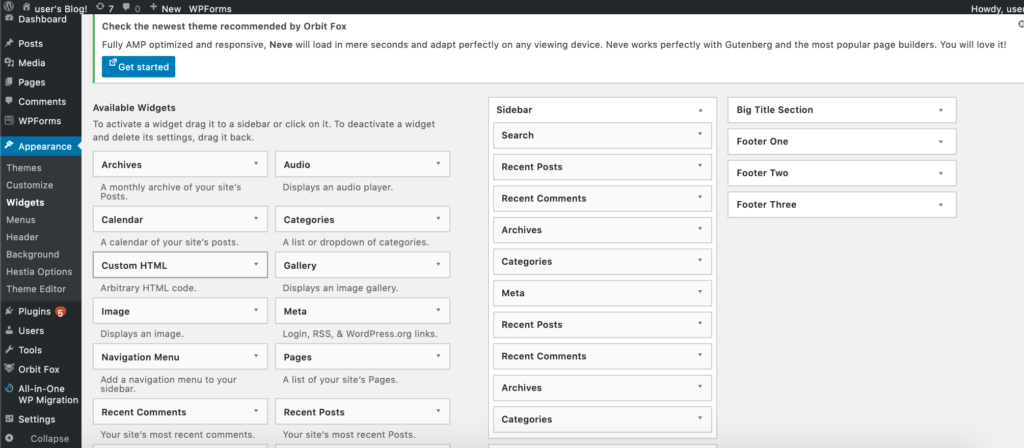
We dragged and dropped the search and recent posts widgets onto the footer one bar on the right.
Let’s see what it looks like on our page:
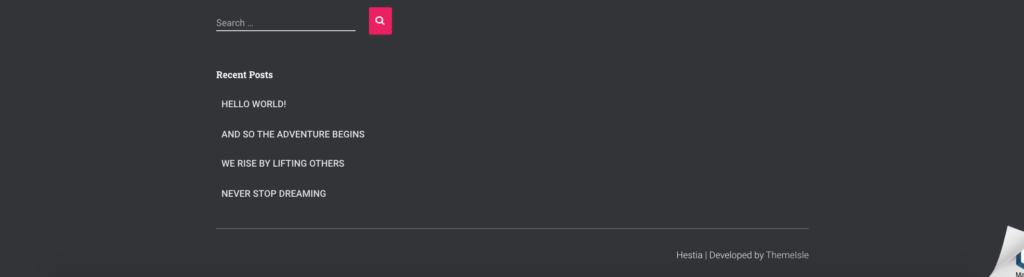
Now your website should be up and running! If you have any questions just let us know!?